
Introduction
Even veteran microscopists get inconsistent AFM images sometimes. A scan that looked crisp on Monday turns fuzzy and drift-ridden by Wednesday, and nothing about the setup seems to have changed.
The frustrating part? Small technique adjustments usually separate publication-quality data from a wasted afternoon in the lab.
A 2024 interlaboratory comparison on silicon nanowires found a 15% standard deviation in mean height measurements across five labs. Roughness results varied even more depending on instrument, operator, and software choices (Measurement Science and Technology, 2024).
This guide compiles practical, field-tested tips covering sample prep, probe selection, calibration, imaging mode choice, and system upkeep. Whether you work in nanotechnology, materials science, or the life sciences, these AFM and STM principles apply.
Key Takeaways
- Repeatable sample prep and environmental control drive image quality more than most researchers assume
- Probe geometry must match your sample type, or you risk poor resolution and tip damage
- Laser alignment and calibration are easy to rush—and beginners lose the most when they do
- Imaging mode selection (contact, tapping, non-contact) should follow sample hardness, not habit
- Routine maintenance and expert repair access protect your instrument and your research timeline
Tip 1: Perfect Your Sample Preparation and Environment
Sample prep isn't glamorous, but it's where most AFM problems start. A tip that behaves predictably on one sample can behave erratically on the next if prep steps aren't disciplined and repeatable. Small deviations (an extra rinse step, a different drying time) change how the tip interacts with the surface the moment you start scanning.
Before setting scan parameters, research the expected feature dimensions and distribution on your sample. Scanning blind wastes hours chasing a signal that was never there to begin with.
Contamination Is the Silent Killer
Contaminated tips produce lower-resolution, distorted images and are a leading cause of the notorious double-tip artifact (Microscopy Research and Technique, 2013; npj Computational Materials, 2023). Protect against this with:
- Clean substrates stored in sealed, particulate-free containers
- Fresh gloves for every sample-handling step
- Dedicated tools for cleaving mica or preparing gold-on-mica surfaces
- Separate storage for biological versus inorganic samples
Stabilize the Imaging Environment
Acoustic noise, airflow from HVAC systems, and room-temperature swings all distort measurements at the nanoscale. Differential thermal expansion, in particular, can't be separated from your actual topography signal once it's in the data (JPK NanoWizard AFM Handbook, 2012).
Temperature-controlled stages and isolation chambers aren't optional extras for serious work. Molecular Imaging's environmental control accessories hold conditions steady during long scans. That includes temperature-controlled sample stages rated from -30°C to 250°C and isolation chambers that manage humidity, temperature, and gas atmosphere.

Biological and Liquid Samples Need Extra Care
For BioAFM work, buffer selection and hydration timing directly affect whether your sample survives the imaging session. Liquid cell setups paired with soft cantilevers designed for aqueous environments give biological samples (cells, proteins, DNA) a fighting chance at staying intact through a full scan.
Tip 2: Choose the Right AFM Probe for Your Application
Probe choice comes down to three factors: your sample's material, its hardness, and the imaging mode you're running. Get any of these wrong and you'll either damage your tip, damage your sample, or both.
Tip Radius and Resolution Tradeoffs
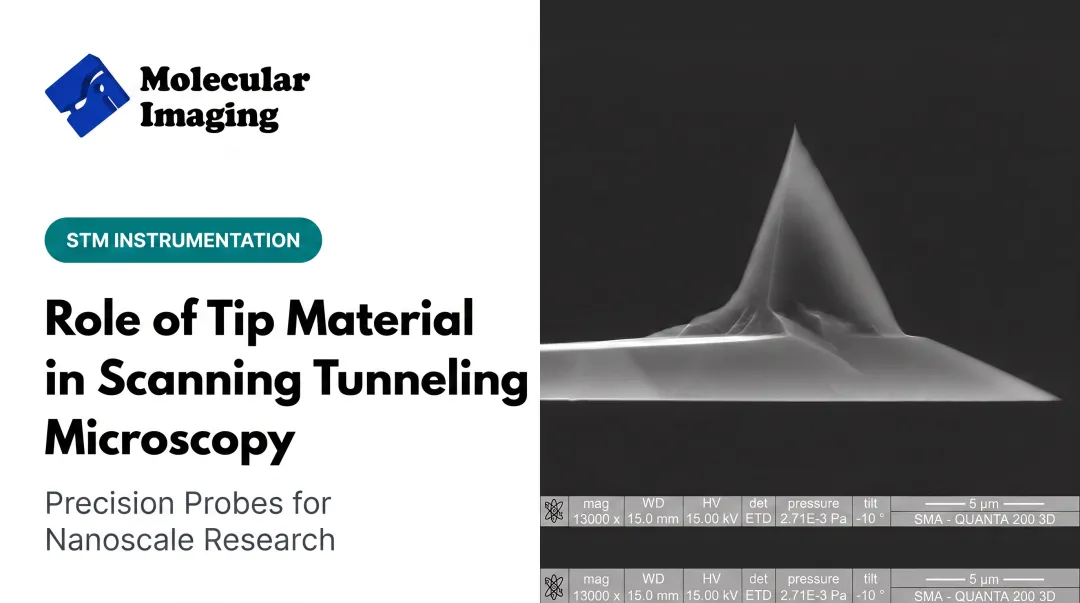
NIST reports that typical AFM tips stand 5-10 μm tall and terminate in radii between 5 and 20 nm (NIST, 2018). Smaller radii generally mean sharper resolution, but they come with tradeoffs:
- Protrusions on your sample will appear larger than they actually are
- Depressions will appear smaller
- Deep, narrow pores get rendered as rounded valleys once the pore diameter approaches the tip's cross-section
High-aspect-ratio probes solve the steep-topography problem. They use steeper sidewall angles and longer spikes so the tip can reach the bottom of deep trenches a standard probe can't.
Specialized Probes for Advanced Modes
Different applications call for entirely different probe designs:
| Application | Probe Type | Key Feature |
|---|---|---|
| Conductive AFM (C-AFM) | Metal- or conductive-diamond-coated | Simultaneous topography and electrical mapping |
| Magnetic Force Microscopy | Cobalt-alloy coated (e.g., 40 nm coating) | Magnetic domain visualization |
| BioAFM in liquid | Soft silicon nitride cantilevers | Low spring constant (0.03–0.5 N/m) for gentle contact |
New Versus Reused Probes
A worn or contaminated probe rarely announces itself until your image starts showing repeated artifacts or that telltale double-tip signature. For publication-quality data, start with a fresh, uncontaminated probe rather than pushing a reused one past its useful life.
Molecular Imaging stocks cantilevers for contact, tapping, liquid, MFM, EFM/KFM, diamond-coated, and conductive work, plus calibration samples—so you can match probe geometry to the application instead of defaulting to a generic tip.
Tip 3: Master Calibration and Laser Alignment
This is the step beginners skip, and it shows up in their data almost immediately.
Getting the Laser Where It Belongs
The laser spot needs to sit precisely at the very end of the cantilever to maximize deflection sensitivity. A common beginner mistake is getting laser reflection on the detector without the beam actually hitting the cantilever. You still get a signal—just not an accurate one.
A validated non-contact sensitivity method reported 2-5% error across most tested cantilevers, and its very first step is positioning the laser as close as possible to the cantilever end (Ultramicroscopy, 2013). Miss that placement and deflection sensitivity drops before you collect a single force curve.
Calibrate Before You Trust Your Numbers
Before running force spectroscopy or mechanical property mapping, calibrate both the cantilever's spring constant and the photodetector sensitivity. NIST's transfer-standard method achieved ±5% to ±10% accuracy across 0.06-12 N/m (Review of Scientific Instruments/NIST, 2007). Nominal manufacturer spring constants often differ substantially from the cantilever on your system.
Use certified calibration standards regularly, not just at install. Molecular Imaging offers reference substrates including 500 nm grid and grating standards along with gold-on-mica substrates, which support both dimensional calibration and tip characterization checks over the life of your system.
Tuning Feedback Gains
Proportional and integral gains control how fast your feedback loop responds to topography. Push gains too high and you risk tip damage. Set them too low and scan speed and image sharpness both suffer.
Tune gains in small steps:
- Start with low proportional and integral values
- Increase incrementally while scanning a familiar sample
- Watch the trace/retrace overlay—oscillation means back off

Tip 4: Match Your Imaging Mode to Your Sample and Troubleshoot Common Issues
The right imaging mode depends on the sample on your stage.
Picking the Right Mode
- Contact mode suits hard, stable materials and mechanical-property measurements, but continuous contact creates shear forces that wear tips and can damage soft samples
- Tapping/AC mode limits shear through periodic contact, so it is the default for polymers and moderately delicate samples
- Non-contact mode keeps repulsive interaction low; soft-matter reviews favor it (with tapping) for biological specimens (Applied Surface Science Advances, 2023)
Light-Tapping to Preserve Your Probe
Higher amplitude setpoints in tapping mode minimize tip wear and keep your probe sharper longer. Lower setpoints produce harder tapping and more stable contrast, but you're trading probe life for it. For fragile samples, start with a higher setpoint and dial down only as needed.
Quick Troubleshooting Checklist
| Symptom | Likely Cause |
|---|---|
| Noisy or distorted image | Contaminated tip, loose debris, acoustic noise, or scan speed outpacing feedback tracking |
| Tip crash or lost tracking | Feedback gain too high, or setpoint mismatched for the mode you're using |
| Thermal drift | Differential thermal expansion, or evaporation during liquid imaging |
Check these common causes before assuming your instrument needs service. Most issues trace back to something fixable at the bench.
Tip 5: Maintain Your System and Know When to Call in Experts
Gradual image degradation rarely announces itself with a dramatic failure. It creeps in through worn probes, drifting calibration, and skipped cleaning cycles.
Build a Routine, Not a Reaction
Replacement indicators to watch for include:
- Increased apparent tip radius on known samples
- Repeated same-shaped features (a strong double-tip signal)
- Visibly reduced resolution compared to your baseline images
Keep spare probes on hand so a degraded tip doesn't stall a research timeline. Pair this with scheduled recalibration checks using your reference standards, rather than waiting for a problem to appear. Fold probe and sample-stage cleaning into the same schedule so contamination does not masquerade as tip wear.
Environmental Control Protects More Than Image Quality
Vibration isolation and a controlled lab environment aren't just about getting a cleaner scan today. They reduce the mechanical and thermal stress your system absorbs over months of use, which matters for long-term accuracy.
When to Bring in a Specialist
Persistent issues such as unexplained noise floors, recurring calibration drift, or hardware faults are signs that general lab troubleshooting has reached its limit.
Molecular Imaging's ZoomAFM service supports Agilent-heritage AFM/STM systems with remote diagnostics, hardware repair using platform-matched parts, and preventive maintenance programs. That mix gets instruments back into reliable service faster than piecing together a fix in-house.

Frequently Asked Questions
What is the best AFM tip for high-resolution imaging?
Ultra-sharp, high-aspect-ratio probes with tip radii in the 10-20 nm range typically deliver the best resolution. The right choice still depends on your sample's hardness and surface topography.
How do I know which AFM imaging mode to use for my sample?
Soft or biological samples benefit from tapping or non-contact modes to avoid damage. Harder, stable samples can handle contact mode, which also allows for faster scanning.
How often should I replace my AFM probe or cantilever?
Replace probes when resolution visibly degrades or after imaging abrasive or contaminating samples. Keeping spares on hand prevents these issues from delaying your research.
Why is laser alignment so important in AFM imaging?
Precise laser alignment at the cantilever tip maximizes deflection sensitivity, which directly affects both image clarity and measurement accuracy. Misalignment can produce a readable signal that's still inaccurate.
Can AFM tips be used for imaging biological samples in liquid?
Yes. Specialized soft cantilevers and BioAFM-compatible systems can image cells and biomolecules in liquid with minimal disturbance, preserving structures that would collapse in air.
What should I do if my AFM system is producing noisy or unreliable images?
Start by checking environmental vibration and acoustic isolation, laser alignment, and probe condition. If problems persist after that, consult a specialized AFM service provider like ZoomAFM.